Flashing the Ender 3 Pro with Klipper Firmware
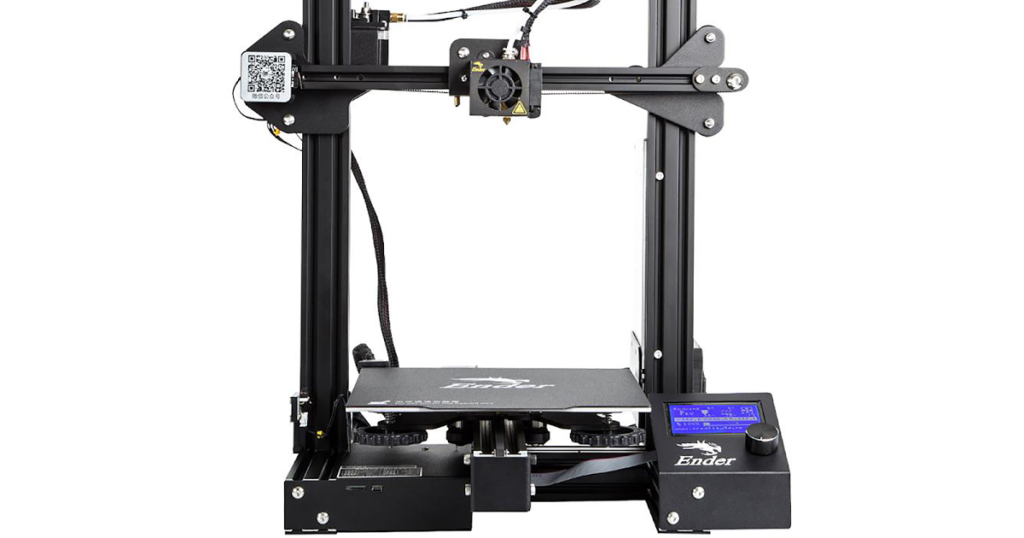
Let me begin by saying what an awesome value the Ender 3 Pro is right out of the box. For less than $200, you get a printer that will crank out prints that rival printers that cost a whole lot more money. However, from day one I have always felt like my printer was running non-stop due to the time it takes to get great quality print. Today, all of that changed.
I had been reading a few posts about people using the Klipper firmware on reddit in r/ender3pro and r/ender3. However, I was yet to find a good tutorial on exactly how to set it up. So I did some digging.
It turns out that there is a fairly good tutorial over on YouTube on the Teaching Tech channel. As I watched the tutorial all the way through the first time, I felt fairly confident that I would be able to flash the firmware and setup Klipper on my printer. So I began. I already had Octoprint up and running and I have been very happy with it so far. So, I cloned the Klipper repo and began working through the steps.
Then I hit a brick wall. When I reached the step where you actually flash Klipper onto the printer I kept receiving an error. Basically the program used to flash, avrdude, was unable to flash the firmware on my printer. So, some serious Googling ensued. I stumbled upon a post that has been archived by Reddit, but was very helpful nonetheless. It is located here. Everyone who commented on this post mentioned that a bootloader would be needed before new firmware could be flashed. I thought I was sunk. However, at the very bottom of the thread the OP posts some links to resources he used to successfully flash Klipper onto his Ender 3 using a Raspberry Pi. The guide is located here.
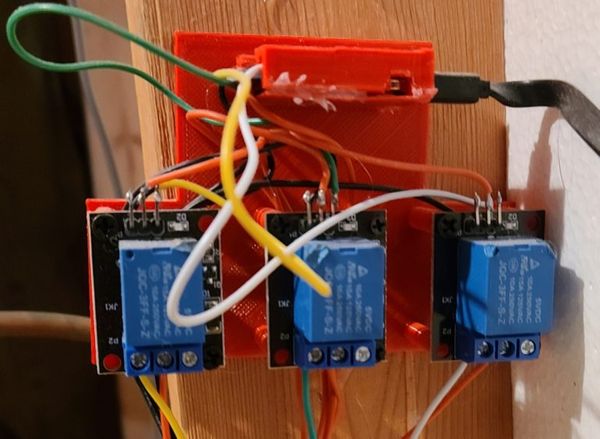
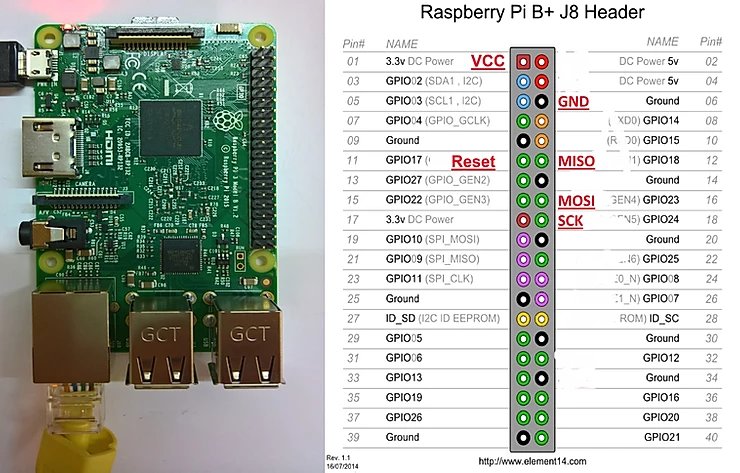
In the guide linked above, the author is using an Ender 5 which, fortunately for Ender 3 users, has the same pin out. So, using the images on their site, which are below, it is pretty easy to use 6 female-to-female jumper wires from the main board of the Ender 3 to a Raspberry Pi. (I used a Pi 3b+.) You then fire up avrdude and flash the bootloader. I will mention this, in the guide they used they use the Arduino IDE to import the Sanguino library and then search for the hex file to sftp to the Pi. I simply cloned the repo and found the hex file, located at Sanguino/avr/bootloaders/optiboot/optiboot_atmega1284p.hex, of whatever local folder you cloned the repo to. For reference, the command is a simple git clone https://github.com/Lauszus/Sanguino.
After flashing the hex file using the commands in the tutorial linked above, I was able to continue with the YouTube video guide. It is worth noting that to flash the bootloader does require you to disconnect the power, remove 6 screws, and connect 6 wires. It may sound daunting but it really is not. There is no soldering needed and I did it by simply leaning the printer back against the wall behind my desk. After flashing the bootloader, remove the jumper wires, put the screws back in, and reconnect the power.
I would very much suggest running through a quick bed leveling after flashing the bootloader and the new firmware. Moving the printer around will almost certainly create an uneven bed.
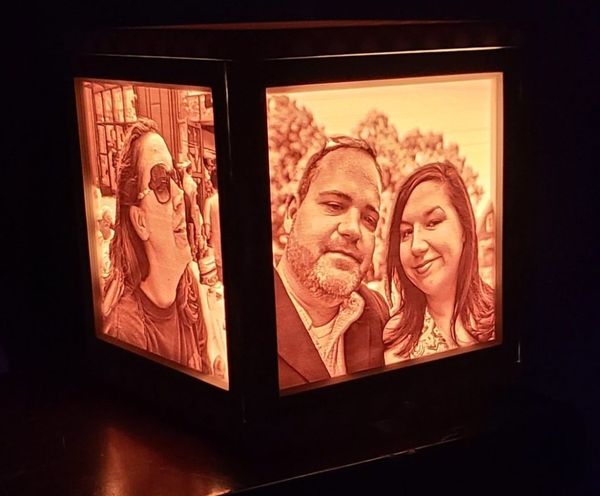
After completing the steps listed in the 2 guides, leveling the bed, and loading up a gcode file I was able to print reliably at 110mm/s. I have heard of others printing at 150mm/s without any issues, I just didn’t want to push it quite that much. I also noticed that at about 120mm/s, the printer did a whole lot more jerking and shaking of my desk. The file I chose to print first was the Hero 3 setup for the Ender 3. If you’ve ever printed this file you know it is a somewhat technical file to print and the results were fantastic at 0.2mm, 220 for the nozzle, and 60 for the print bed. Below are the exact steps I took and commands I ran to flash the bootloader and Klipper onto my printer. I must state at this point that I bare no responsibility for anything that happens to your hardware. These are the steps I took to successfully complete the process. Commands are in bold type.
1.) Disconnect the power from the printer, remove the 6 screws on the cover plate for the main board, and connect jumper wires. (Images below are credited to Fission3d.com)

2) sudo apt-get install avrdude
3) avrdude -v (verify that avrdude is installed and working)
4) cp /etc/avrdude.conf ~/avrdude_gpio.conf
5) nano ~/avrdude_gpio.conf
6) ctrl+w and search for “linuxspi”
7) Change the “baudrate” value to 115200
8) At the very bottom of the file add the following, as long as you used the pins shown above, the following will work without issue:
# Linux GPIO configuration for avrdude.
# Change the lines below to the GPIO pins connected to the AVR.
programmer
id = “pi_1”;
desc = “Use the Linux sysfs interface to bitbang GPIO lines”;
type = “linuxgpio”;
reset = 17;
sck = 24;
mosi = 23;
miso = 18;
;
9) Ctrl+O to save and Ctrl+X to close
10) Initialize avrdude with the following command. If it says initialized and ready, you can move on.
sudo avrdude -p atmega1284p -C ~/avrdude_gpio.conf -c pi_1 –v
11) Now you will be flashing the hex file from the Github repo that we cloned from Sanguino. In my case, I just cloned the repo using the raspberry pi and copied the hex file to the home directory. If you used another pc, you will need to connect using sftp and save the file in the home directory. The command to flash is as follows:
sudo avrdude -p atmega1284p -C ~/avrdude_gpio.conf -c pi_1 -v -U flash:w:optiboot_atmega1284p.hex:i
11) When avrdude says it is done, you have completed flashing the bootloader. If the screen on your Ender 3 is blank, this is normal, don’t panic. You now need to flash the firmware. If you wanted, you could use this same process to flash a newer or custom Marlin firmware on your Creality printer. For the record and to save some headaches, I only have an Ender 3, I cannot and will not offer any type of help or support for any other printers. I have no way to test if a solution you are attempting will or will not work.
12) At this point you are now ready to follow the YouTube guide for flashing Klipper. I would write out the steps, but I think the video does a much better job of showing while doing. If you prefer a text based approach, you can find all of the documentation and installation procedure here.
Without further delay, here is the video from Teaching Tech on YouTube. Be sure to check out their channel, they have plenty more great videos on 3D printing and more. Until next time, thanks for reading and best of luck, I promise the increase in speed and quality is worth the trouble.